Appearance
Tracking Progress
TrackBear is all about tracking your writing progress, and this page is all about how you do that in TrackBear.
Do you have a project set up?
You need at least one project set up in order to enter progress. If you haven't set one up yet, go do that first. If you need help, you can read more about creating projects here.
Enter progress
You can enter writing progress from any screen in TrackBear. You have two buttons to choose from, which both do the same thing:
- The Enter Progress button at the top of the sidebar, under the TrackBear logo:

- The circular button in the bottom right corner of your screen with the same icon:

When you click either one, it'll bring up the Add Progress dialog box:
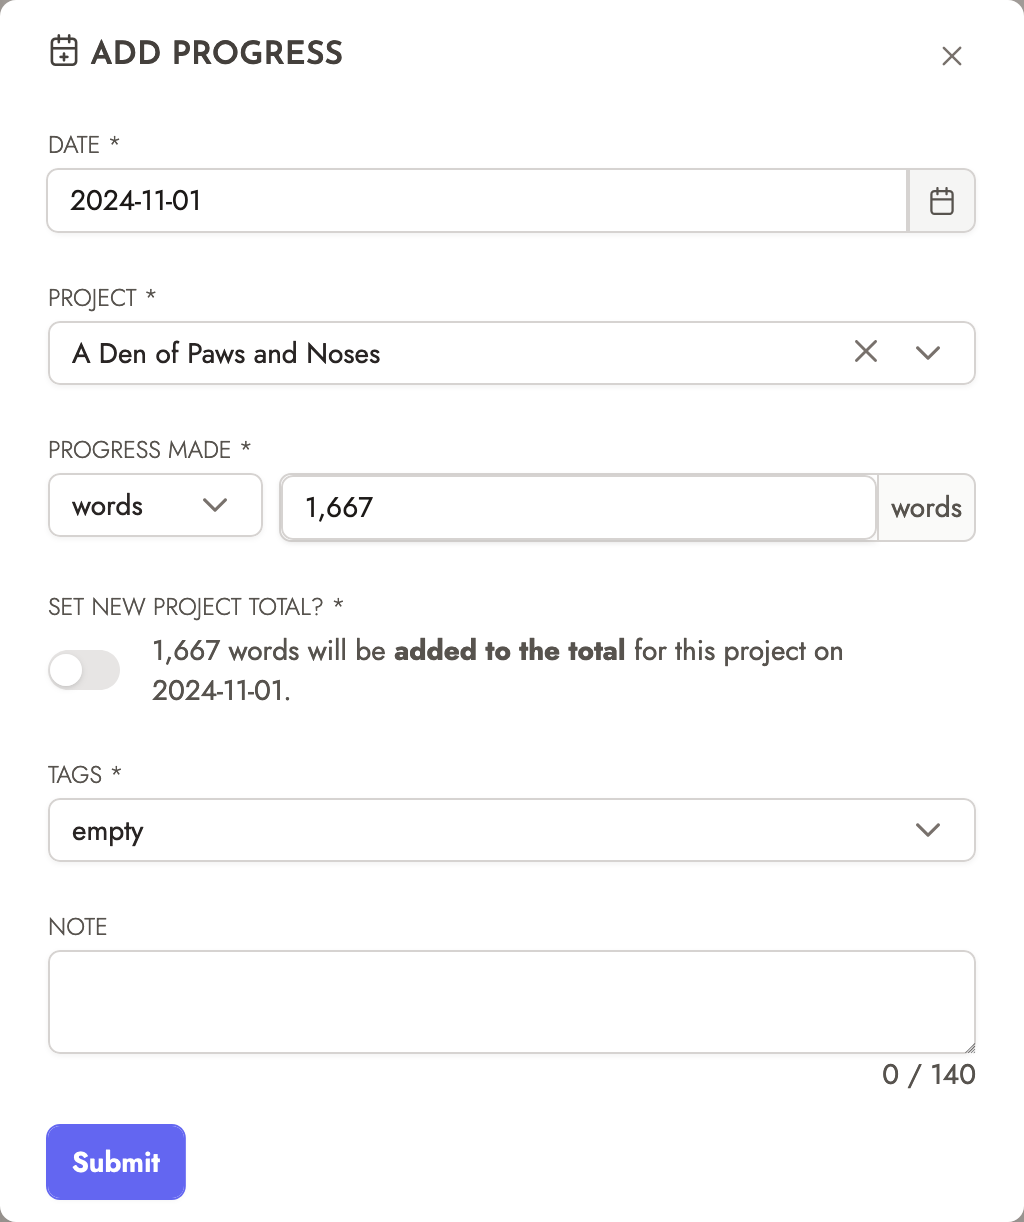
Here's what each field does:
- Date: This is the date you're tracking your writing progress for. It doesn't have to be today! You can fill in progress from yesterday, or a month ago, or even tomorrow. You can also add multiple entries for each day, if you want.
Don't worry about midnight!
All of TrackBear's graphs are always calculated in-the-moment, which means you never have to worry about getting progress in by midnight. Did you write a marathon session and fall asleep at 11:59pm? When you wake up, pick yesterday's date when entering progress, and all your goals and leaderboards will automatically update as if you'd entered it the day before.
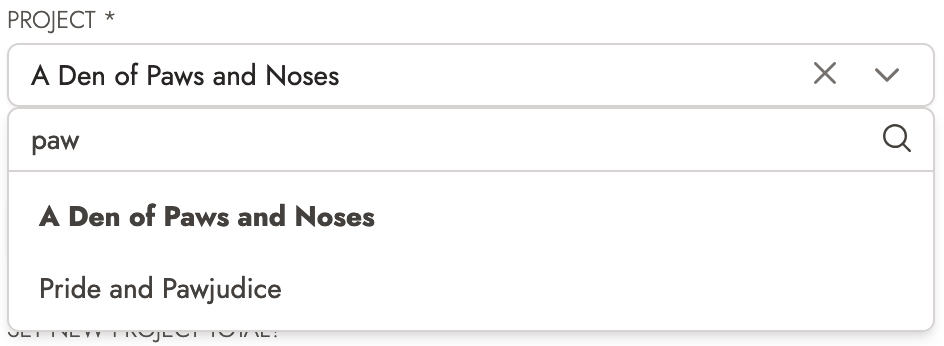
- Project: Pick the project that you made progress on. Projects are sorted by title, with starred projects up top. If you want to search for a specific project, you can do so by typing the search bar on top of the dropdown:
By the way...
If you bring up the Add Progress dialog box on a project page, that project will be pre-selected for you.
- Progress Made: Fill in the progress you made here! Use the dropdown to select words, time, pages, chapters, scenes, or lines. You can even mix-and-match in the same project if you want. Then enter how much progress you made in the text box next to it. (Want to put in your new total instead of just the words you wrote today? Keep reading...)
Zero isn't nothing!
You can enter zero progress if you want to, or even negative progress. You might do this on a day when you spent time writing, but perhaps deleted everything you wrote, or maybe even edited your project down so it was smaller. TrackBear treats this differently than a day where you haven't entered anything at all: it gives you credit for writing that day, even if your numbers didn't change.
Set New Project Total? By default, TrackBear will add the count in the Progress Made field to your current total. If you instead want to put in your new total and have TrackBear do the math for you, toggle this switch. The message will change from "added to the total" to "set as the total".
Tags: Add any relevant tags for this progress entry here. Tags can help you set up goals and leaderboards that include progress that spans multiple projects, but they are definitely an optional part of TrackBear. Read more about tags here.
Note: If you want, leave yourself a little note! Did you write a particularly cool scene? What music did you listen to? Or whatever else you want (as long as it's less than 140 characters).
When you've filled out all the relevant info, hit Submit and your progress will be saved.
See your progress
Your progress in each project is displayed in three different ways on that project's page: an activity heatmap, a graph, and a table.
Activity heatmap

The activity heatmap displays a square for each day since you started working on the project (up to a year). The darker a square is, the more progress you logged that day.
Graph
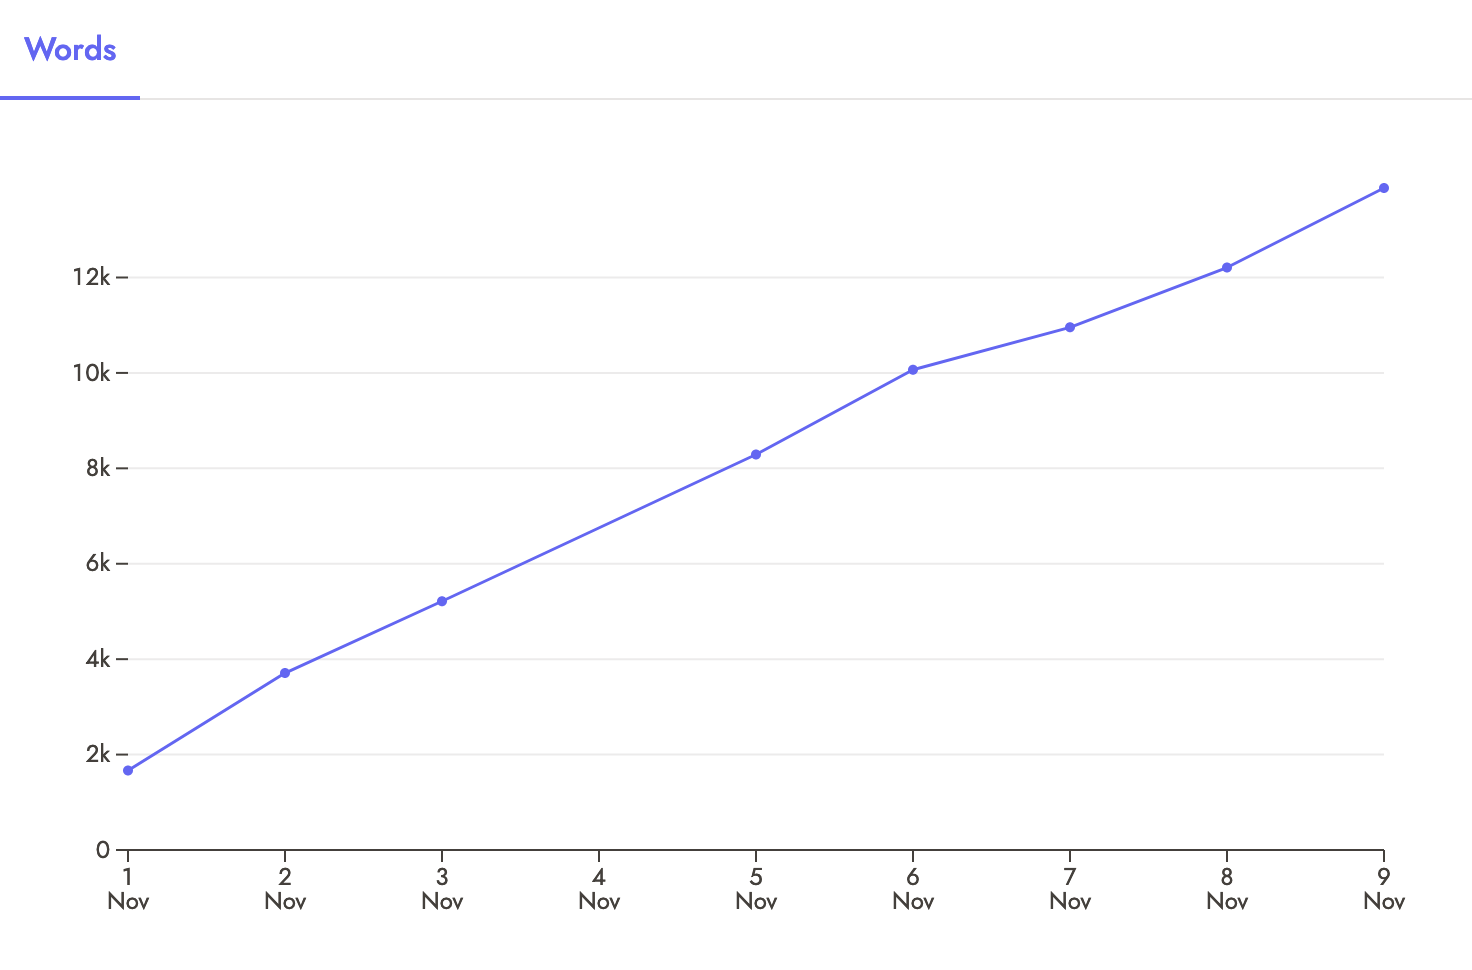
The graph shows your accumulated progress from the beginning of the project till the last day you logged progress. If you have been logging progress using more than one measure (e.g., with both words and time), use the tabs to switch between measures.
Looking for a graph with a par line?
Projects don't include a par line because they're just about collecting progress on a single project. To get a par line, set up a target goal and make sure you select this project and add a start and end date.
Table
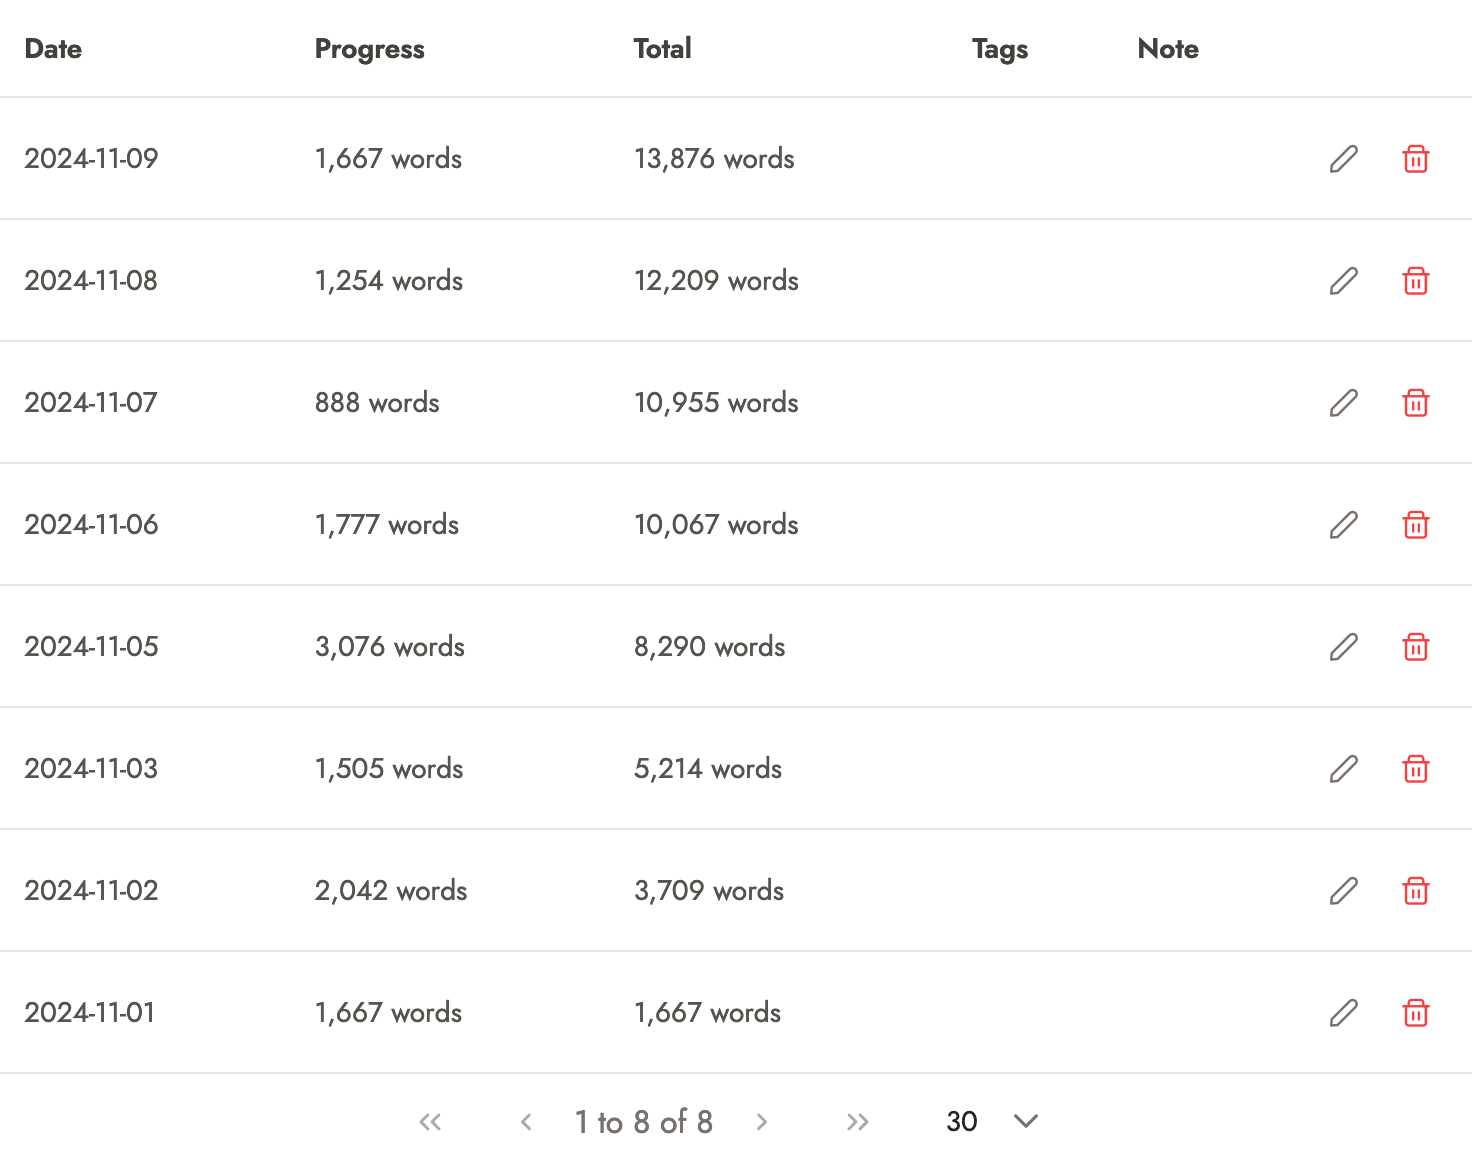
The table shows every progress entry you made for this project, along with the total, tags, and note for each progress entry. You can use the table to edit a previous entry or delete an entry altogether.
Change a previous entry
Whether you mistyped your word count, picked the wrong day, or forgot to add a tag, don't sweat it. You can always edit your progress entries. Here's how.
- Go to the appropriate Project page.
- Scroll down until you find the table with all your progress entries for that project.
- Find the row for the progress entry you want to change. (You may need to go in a few pages, if it was a while ago.)
- Click the pencil icon on that row:

- Make the changes in the Edit Progress Entry dialog box that pops up.
- Click Submit.
Everything is back as it should be!
Delete a previous entry
If you accidentally entered your progress twice, picked the wrong project, or need to delete a progress entry for any other reason, here's how.
- Go to the appropriate Project page.
- Scroll down until you find the table with all your progress entries for that project.
- Find the row for the progress entry you want to change. (You may need to go in a few pages, if it was a while ago.)
- Click the red trash icon on that row:
- Make sure this is the progress entry you want to delete.
- Click Delete.
And now it's like it never happened.